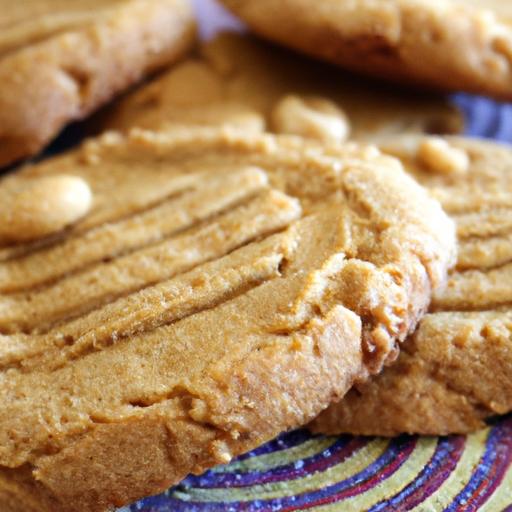
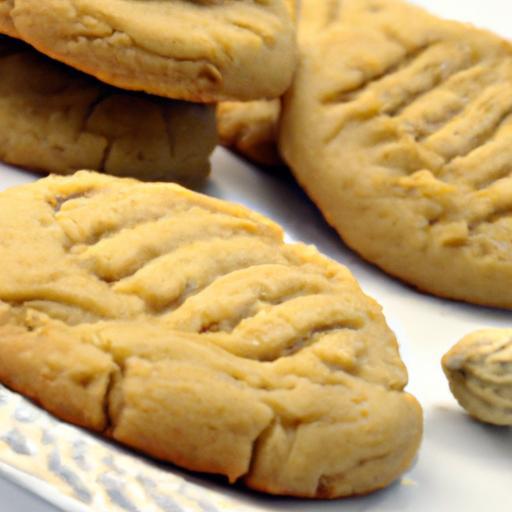
Ther’s something irresistibly comforting about the classic peanut butter cookie-the tender crumb,the rich,nutty flavor,and that perfect hint of sweetness. but for those navigating a gluten-free lifestyle, finding a recipe that captures that same appetizing magic can feel like a daunting challenge. Fear not! This guide unlocks a simple,foolproof method to create mouthwatering gluten-free peanut butter cookies that everyone will love. Whether you’re gluten-intolerant, allergic, or simply seeking a wholesome treat, these cookies prove that going gluten-free doesn’t mean sacrificing taste or texture. Get ready to bake your way to buttery, chewy perfection-no gluten required!
Delicious Gluten-Free Peanut butter Cookies start with selecting the ideal blend of flours and mastering the peanut butter balance that brings out rich, comforting flavors in every bite. The right flour combination creates a tender yet chewy texture,while the perfect peanut butter blend ensures your cookies boast deep,nutty richness that lingers delectably on the palate.
Prep and Cook Time
- Prep Time: 15 minutes
- Cook Time: 12-14 minutes
- Total Time: 27-29 minutes
Yield
About 24 medium-sized cookies
difficulty Level
Easy – perfect for bakers of all skill levels
Ingredients
- 3/4 cup gluten-free oat flour (finely ground, for chewy texture)
- 1/2 cup blanched almond flour (for moistness and subtle nutty undertones)
- 1/4 cup tapioca starch (a binder that adds stretch)
- 1/2 teaspoon baking soda
- 1/4 teaspoon fine sea salt
- 1 cup smooth natural peanut butter (creamy for richness and binding)
- 3/4 cup light brown sugar, packed (adds caramel notes and moisture)
- 1 large egg (at room temperature)
- 1 teaspoon pure vanilla extract
- Optional: 1/4 cup dark chocolate chips or chopped roasted peanuts (for enhanced texture and flavor)
Choosing the Perfect Gluten-Free Flours for Peanut Butter Cookies
Start with gluten-free oat flour as your cookie’s base-it’s naturally mild and lends a gorgeous chewiness without a gritty aftertaste. Combining it with blanched almond flour ensures moisture retention and a delicate nuttiness that pairs flawlessly with peanut butter. Tapioca starch plays a crucial role by giving your cookies flexibility and a soft crumb.Avoid single-flour formulas; blending flours creates multidimensional textures and guarantees that soft but chewy bite we all crave.
Mastering the Ideal Peanut Butter blend for Rich Flavor
the heart of these cookies is the peanut butter, so choose a natural variety without added sugar or hydrogenated oils. Creamy peanut butter will yield the utmost richness and help bind your dough uniformly. If you desire a bit more texture, try folding in roasted peanut pieces at the end.The subtle saltiness and robust peanut essence will create a dynamic flavor that feels indulgent yet wholesome.
Step-by-Step Baking Tips for Soft and Chewy Cookies
- Preheat your oven to 350°F (175°C).Line a baking sheet with parchment paper to prevent sticking and promote even baking.
- In a medium bowl, whisk together the gluten-free oat flour, almond flour, tapioca starch, baking soda, and sea salt. Setting this aside allows for even mixing later and ensures your baking soda evenly distributes.
- In a large bowl, cream the peanut butter and brown sugar with a handheld or stand mixer on medium speed until fluffy and light, about 2-3 minutes. This aeration step helps create soft cookies.
- Add the egg and vanilla extract to the peanut butter mixture and beat until smooth. Incorporate these slowly for a consistent dough texture.
- Gradually add the dry ingredients into the wet, folding gently with a spatula. Avoid over-mixing to keep cookies tender.
- If using add-ins like chocolate chips or chopped peanuts, fold them into the batter now to distribute evenly.
- Using a cookie scoop or tablespoon,drop dough balls onto the lined baking sheet,spaced 2 inches apart to allow for gentle spreading.
- Flatten each ball slightly with a fork,imprinting a classic crisscross pattern that also helps cookies bake evenly.
- Bake for 12-14 minutes, or until the edges are lightly golden but centers remain soft. The cookies will firm up as they cool, ensuring a chewy texture.
- Transfer to a wire rack to cool completely before serving to allow flavors to fully develop.
Creative Add-Ins to Elevate Your Gluten-Free Treats
Want to take your cookies beyond classic? Here are a few ideas to add a new dimension of taste and fun:
- Mini dark chocolate chips: For a bittersweet contrast that melts deliciously against the peanut butter.
- Toasted coconut flakes: Add an unexpected tropical crunch and aroma.
- Sea salt flakes: Sprinkle lightly atop each cookie before baking to enhance sweetness and flavor complexity.
- Chopped dried cranberries or cherries: For bursts of tartness amidst the creamy nutty base.
- Espresso powder (1/2 teaspoon): Mix into the batter to deepen the richness with subtle coffee notes.
Chef’s Notes and Tips for Success
- Dough consistency: If your dough feels too sticky, chill it for 15 minutes before scooping-this makes handling easier without compromising softness.
- Peanut butter alternatives: for variety, natural almond or sunflower seed butter also work wonderfully, adjusting salt accordingly.
- Storage: Store cookies in an airtight container at room temperature for up to 5 days or freeze for up to 3 months, thawing gently before serving.
- Make-ahead tip: prepare the dough and refrigerate overnight to intensify flavor and improve texture.
- Oven calibration: Use an oven thermometer to ensure consistent baking temperature for perfect edges every time.
serving Suggestions
serve these cookies warm or at room temperature alongside a tall glass of almond milk or your favorite dairy-free alternative. For an elegant touch, add a light dusting of powdered sugar or a drizzle of melted dark chocolate.Garnish plates with a few roasted peanuts and fresh mint leaves to complement the nutty aroma and create a visually inviting presentation perfect for any occasion.

| Nutrient | Per Cookie |
|---|---|
| Calories | 120 kcal |
| Protein | 4 g |
| carbohydrates | 12 g |
| Fat | 7 g |
For more baking inspiration and gluten-free recipes, explore our gluten-free desserts collection. Curious about the science behind gluten-free baking? Check out this detailed guide from Gluten intolerance Group to deepen your knowledge.
Q&A
Q&A: Delicious Gluten-Free Peanut Butter Cookies – Easy Recipe Guide
Q1: Can I really make peanut butter cookies that are both gluten-free and delicious?
A1: Absolutely! Gluten-free doesn’t mean flavor-free. with the right ingredients-think creamy peanut butter,natural sweeteners,and gluten-free flours-you can bake cookies that taste just as indulgent and satisfyingly chewy as the customary ones. It’s all about balancing flavors and textures.Q2: What’s the best peanut butter to use for these cookies? Creamy or crunchy?
A2: Both work beautifully,but it depends on your cookie texture preference. Creamy peanut butter gives a smooth, tender cookie, while crunchy peanut butter adds delightful bursts of peanut crunch. Just be sure to use a natural or unsweetened variety for a richer peanut flavor and less sugar overload.Q3: Which gluten-free flour is ideal for peanut butter cookies?
A3: Almond flour, oat flour, or a good gluten-free all-purpose blend are fantastic options. Almond flour adds a moist, nutty note that complements peanut butter perfectly.Oat flour is mild and slightly sweet. Gluten-free blends usually contain a mix of rice flour,tapioca starch,and potato starch and yield the most traditional cookie texture.
Q4: How do I ensure my gluten-free peanut butter cookies don’t turn crumbly?
A4: Gluten provides structure, so without it, moisture and binding matter more. Adding an egg or a flax egg binds the dough,while a bit of coconut oil or butter ensures tenderness. Also, don’t overbake-just golden edges mean soft, chewy cookies inside.
Q5: Can I tweak the sweetness in these cookies?
A5: Absolutely! Feel free to adjust sugar amounts to your taste. Honey, maple syrup, or coconut sugar are grate natural alternatives that blend well with peanut butter’s richness. Just remember that liquid sweeteners might affect cookie texture slightly, so adjust flour ratios if needed.
Q6: What’s a simple way to add a creative twist to these peanut butter cookies?
A6: Mix in dark chocolate chips, toasted chopped nuts, or even a sprinkle of sea salt on top before baking. Each addition layers extra complexity-salty, sweet, crunchy, and melty-all complementing the peanut butter’s earthy warmth.
Q7: How should I store these gluten-free peanut butter cookies?
A7: Store them in an airtight container at room temperature for up to 5 days. For longer freshness, tuck them in the fridge-they’ll keep up to two weeks and remain tasty. You can also freeze the dough balls for future baking sessions.Q8: Are these cookies suitable for people with peanut allergies if I swap the peanut butter?
A8: While this recipe celebrates peanut butter’s flavor, if allergies are a concern, sunflower seed butter or almond butter can be good substitutes. Just check labels to ensure those alternatives are also gluten-free and allergen-friendly.
Q9: Can kids get involved in baking these cookies?
A9: Definitely! This recipe is wonderfully simple-kids love mixing the dough and rolling the balls. Plus, the sweet peanut aroma filling the kitchen is a bonus reward for everyone involved.
Q10: Why choose homemade gluten-free peanut butter cookies over store-bought?
A10: Homemade means control-control over ingredients, sweetness levels, and freshness. You avoid hidden additives,preservatives,and questionable fillers often lurking in store-bought gluten-free goodies. plus, the satisfaction of creating your own batch? Priceless.
Key Takeaways
With this easy recipe guide in your kitchen arsenal, crafting delicious gluten-free peanut butter cookies has never been simpler-or more satisfying. Whether you’re catering to dietary needs or simply craving a rich, nutty treat, these cookies prove that gluten-free doesn’t mean flavor-free. So go ahead, roll up your sleeves, embrace the aroma of freshly baked goodness, and share these chewy delights with friends and family. Happy baking, and here’s to enjoying every bite of your homemade peanut butter perfection!