In a world that moves at lightning speed, finding convenient and nourishing snacks can be a game-changer. Enter homemade trail mix bars-a delightful fusion of crunchy nuts, sweet dried fruits, and wholesome grains, all packed into one portable power bite. Whether you’re gearing up for a busy workday, an afternoon hike, or simply need a nutritious pick-me-up, thes easy-to-make bars offer the perfect blend of energy and flavour. Ready to power up your day the tasty way? Let’s dive into the art of crafting your own trail mix bars that fuel your body and satisfy your cravings, no matter where life takes you.
Power Up Your Day wiht Easy Homemade Trail Mix Bars by selecting the finest ingredients that blend both vitality and irresistible taste. Crafting your ideal trail mix bars at home begins with choosing nutrient-packed nuts, seeds, dried fruits, and natural sweeteners that invigorate your energy levels while exciting your palate. This guide will help you master the art of ingredient harmony, customize textures to suit your cravings, and employ smart storage techniques to keep every bar fresh and flavorful.
Prep and Cook Time
- Preparation: 15 minutes
- Cooking/Baking: 20 minutes
- Cooling: 30 minutes
Yield
About 12 bars (depending on size)
Difficulty Level
Easy – Perfect for beginners and busy snack lovers alike
Ingredients
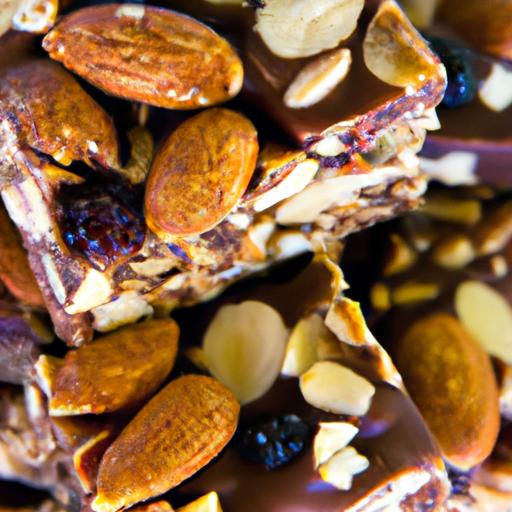
- 1 cup raw almonds, chopped roughly
- 1/2 cup pumpkin seeds, shelled
- 1 cup rolled oats, gluten-free if preferred
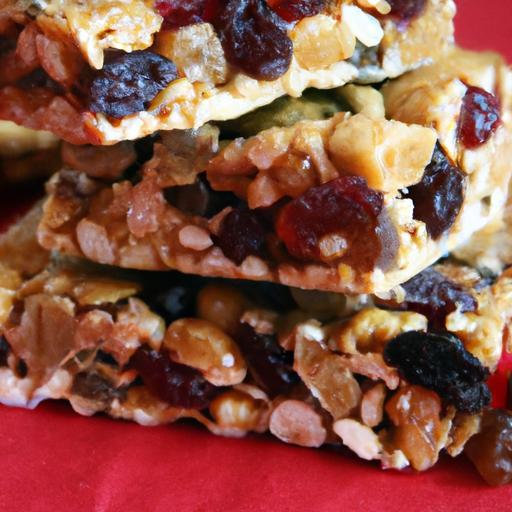
- 1/2 cup dried cranberries, unsweetened
- 1/2 cup dried apricots, chopped
- 1/3 cup natural almond butter
- 1/3 cup honey or pure maple syrup
- 1 tsp vanilla extract
- 1/4 tsp sea salt
- Optional: 2 tbsp chia seeds for extra fiber and omega-3
Instructions
- Toast the nuts and seeds: Preheat your oven to 350°F (175°C). Spread almonds and pumpkin seeds evenly on a baking sheet. Bake for 8-10 minutes until fragrant and lightly golden. Toasting enhances flavor and crunch.
- Combine dry ingredients: In a large mixing bowl, add toasted nuts and seeds, rolled oats, dried cranberries, dried apricots, and chia seeds (if using). Mix well to distribute ingredients evenly.
- Prepare wet binder: In a small saucepan over low heat, gently warm almond butter and honey (or maple syrup) until smooth and easily stirrable, about 3-4 minutes. Remove from heat and stir in vanilla extract and sea salt.
- mix it all up: Pour the warm almond butter mixture over the dry ingredients. Using a spatula or wooden spoon, fold everything together until all components are evenly coated and sticky.
- Press into pan: Line an 8×8-inch square baking dish with parchment paper. Transfer the mixture into the pan and press down firmly using the back of a spoon or clean hands. Compacting the bars helps them hold together when sliced.
- Chill and set: Refrigerate for at least 30 minutes or until the bars are firm to the touch.
- Slice carefully: Lift the parchment out of the pan and place it on a cutting board. Using a sharp knife, cut into 12 equal bars. Store in an airtight container, separated with parchment paper for easy grabbing.
Tips for Customizing Texture and Nutritional Balance
Adjusting your homemade trail mix bars to match your textural preferences and nutritional goals is both fun and rewarding. For a crunchier bite, increase the quantity of nuts and seeds or swap rolled oats for puffed brown rice to add lightness. If you prefer chewy bars, opt for softer dried fruits like dates or figs rather of apricots. For added protein without sacrificing flavor, consider adding a scoop of vanilla plant-based protein powder before mixing wet and dry ingredients. Balancing sweet and savory elements enhances satisfaction; add a pinch more sea salt or a sprinkle of cinnamon to highlight the natural sweetness.Remember, your bars are a blank canvas – experiment boldly!
Smart storage Solutions to Keep Freshness Intact
Preserving the vibrant flavors and energizing crunch of your trail mix bars is simple with the right storage. Store bars in an airtight glass container or reusable silicone bags at room temperature for up to 5 days. For longer storage, freeze individual bars wrapped tightly in parchment paper and placed in a freezer bag; thaw them overnight in the fridge for a ready-to-eat boost anytime.Keeping bars cool and dry prevents sogginess and protects delicate nuts from going rancid, ensuring every bite tastes just like the first.
Serving Suggestions
Enjoy these trail mix bars as a wholesome breakfast companion with a cup of your favorite herbal tea or energize your afternoon with a refreshing smoothie bowl topped with fresh berries. For a visual and taste upgrade, drizzle melted dark chocolate or a sprinkle of toasted coconut flakes on top before chilling.Pairing bars with nut or seed milks can add creamy contrast while boosting protein intake. These bars travel well-pack a couple in your bag for post-yoga nourishment, hiking adventures, or office snacks.
| Nutrient | Per Bar (Approx.) |
|---|---|
| Calories | 190 |
| Protein | 5g |
| Carbohydrates | 22g |
| Fat | 9g |

For a deeper dive into natural energy snacks, explore our related article Healthy Energy Snacks for Busy Days. Additionally, the experts at Healthline provide excellent insights into nutrient-dense trail mix combinations.
Q&A
Q&A: Power Up Your Day with Easy Homemade Trail Mix Bars
Q1: why should I consider making my own trail mix bars at home?
A: Homemade trail mix bars give you full control over the ingredients, allowing you to customize flavors, textures, and nutrition. Unlike store-bought bars,you can skip preservatives,reduce added sugars,and pack them with your favorite nuts,seeds,and dried fruits for a truly energizing snack.
Q2: What are the key ingredients in a simple homemade trail mix bar?
A: The foundation usually includes a mix of nuts (like almonds or cashews), seeds (such as chia or pumpkin), dried fruits (think cranberries or apricots), and a binder like honey, maple syrup, or nut butter. Oats or puffed grains add heartiness and chew, while a dash of spices like cinnamon can boost flavor.
Q3: How do I ensure my trail mix bars hold together without falling apart?
A: The secret is in the binder and proper pressing. Using sticky ingredients-like natural nut butter combined with a bit of honey or maple syrup-helps the dry mix stick. Once combined, firmly pressing the mixture into a lined pan and allowing it to chill in the fridge sets the bars tightly.
Q4: Can I cater these bars to specific dietary needs?
A: Absolutely! For gluten-free, use certified gluten-free oats or grains. Vegan options are easy with maple syrup and plant-based nut butters. For extra protein, add nuts, seeds, or plant-based protein powders. You can tailor every batch to fit your lifestyle and taste preferences.
Q5: What’s the best way to store homemade trail mix bars?
A: After cutting, store the bars in an airtight container. They last well in the fridge for up to two weeks or can be frozen for up to three months. Just wrap each bar individually to keep freshness intact, making them perfect on-the-go snacks.Q6: How versatile are trail mix bars in flavors and add-ins?
A: The possibilities are endless! Swap pumpkin seeds for sunflower seeds, dried apricots for raisins, or add in shredded coconut, dark chocolate chips, or a sprinkle of sea salt. Experimentation lets you create your personal signature bar to power thru any part of your day.
Q7: Can trail mix bars boost energy better than typical snacks?
A: Yes! They combine complex carbs, healthy fats, and protein, delivering sustained energy without the sugar crashes from processed snacks. Perfect for mid-morning fuel or an afternoon pick-me-up, they nourish your body while satisfying your hunger.
Ready to energize your day? Homemade trail mix bars make healthy snacking simple, creative, and delicious!
The Way Forward
With just a handful of simple ingredients and a few minutes of your time, homemade trail mix bars can become your new go-to snack-packed with energy, flavor, and the satisfaction of knowing exactly what’s inside. Whether you’re fueling a busy workday, powering through a workout, or seeking a wholesome treat on the go, these bars rise to the occasion.So roll up your sleeves, mix up your favorite combinations, and power up your day the homemade way-because vitality tastes best when crafted by you.