
There’s something undeniably comforting about a steaming mug of cocoa-the rich aroma, the velvety smoothness, and that delicate warmth that wraps around you like a cozy blanket. But achieving that perfect temperature can be trickier than it sounds.Heat it too little, and the chocolate clings stubbornly to the bottom of your cup; heat it too much, and the milk scalds, turning your sweet treat bitter. So,how long should you microwave milk to create that ideal warmth for your cocoa? In this article,we’ll dive into the science and secrets behind microwaving milk just right-ensuring every sip is a deliciously warm embrace.
Choosing the Right Microwave Setting for Creamy Cocoa
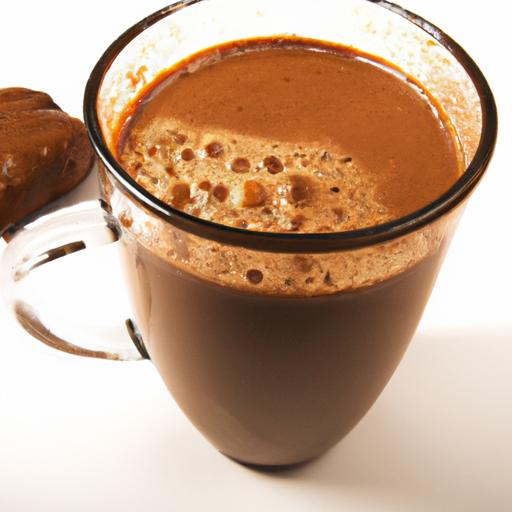
Perfectly warmed milk is the secret to achieving that luscious, velvety texture in your mug of cocoa. Microwaving milk can be tricky-too hot, and you risk scorching; too cold, and the cocoa dissolves unevenly. The ideal microwave setting balances gentle, even heating with enough warmth to unlock the milk’s creamy sweetness.
To start, use the medium or 50% power setting on your microwave rather than full blast. This reduces the chance of overheating while allowing the milk to warm gradually,encouraging a smooth consistency without any burnt flavors. High power frequently enough causes rapid boiling and scalding, producing an unpleasant skin layer on top.
For small portions (about 1 cup or 240 ml),heat for 30-second bursts at medium power. Stir the milk between intervals to ensure even temperature distribution, which helps keep the milk silky and ready for cocoa mixing.
Step-by-Step Guide to Heating Milk Without Scorching
- Measure your milk. Pour exactly 1 cup of milk into a microwave-safe glass or ceramic mug. Using a larger container than needed helps prevent spills as the milk expands slightly when heated.
- Set microwave to medium power (about 50%). This softens the heat intensity and controls the warming process efficiently.
- Heat in 30-second increments. After each interval, carefully remove the mug and stir gently with a spoon to break up any developing skin or bubbles.
- Check the milk’s warmth. Use your finger or a food thermometer. aim for around 140°F (60°C), the ideal temperature where milk feels warm but not hot, avoiding the burnt taste.
- Stop heating once the milk is steaming gently. Avoid boiling, which creates a film and changes flavor.
Signs Your Milk is perfectly Warmed for the Ultimate Mug
Recognizing when your milk is just right is key to your cozy cocoa experience. You’ll notice the milk is steaming but not bubbling, with a tempting warmth that comforts your hand holding the mug. If using a thermometer, it should read about 140°F (60°C). The surface will be smooth and free of skin formation. The aroma will carry a sweet, toasty note, signaling milk proteins have gently warmed without scorching.
If the milk forms a thin film or you see tiny bubbles rapidly rising, it’s likely too hot and on the verge of boiling. To rescue over-heated milk,reduce the heat source or stir in a little fresh cold milk to balance the temperature.
Troubleshooting Common Microwave Heating Mistakes for Cocoa
- Milk boils over: Use larger mugs or lower microwave power settings. heating in short bursts prevents sudden boiling.
- Milk scorches or tastes burnt: Avoid high power or heating for too long uninterrupted. Stir milk frequently to distribute heat evenly.
- Cold spots in milk: Stir between heating intervals to mix hot and cooler areas, ensuring an even temperature throughout.
- Milk forms a skin: Cover the mug loosely with a microwave-safe cover or paper towel to retain moisture and prevent film from developing.
By following these techniques, your milk will reach the perfect temperature to blend into the richest, creamiest cocoa that feels like a warm hug in every sip.

Q&A
Q&A: Perfectly Warmed – How Long to Microwave Milk for Cocoa
Q1: Why is microwaving milk for cocoa better than stovetop heating?
A1: Microwaving milk is quick, convenient, and energy-efficient.It heats your milk evenly without constant stirring, saving time while still delivering that cozy warmth needed for a perfect cup of cocoa.
Q2: How long should I microwave milk to make cocoa?
A2: Generally,30 to 45 seconds on high power is ideal for 1 cup (about 240 ml) of milk. This duration warms the milk enough without scorching it or causing it to boil over.
Q3: Does the type of milk affect the microwaving time?
A3: Yes! Whole milk heats a bit slower due to its fat content, while skim and plant-based milks like almond or oat heat faster. Feel free to start with 30 seconds and add 10-second increments as needed until you reach your desired temperature.
Q4: How can I tell if the milk is perfectly warmed for cocoa?
A4: The milk should feel comfortably warm to the touch-not hot enough to burn your lips or scald the cocoa blend. Aim for about 130°F to 150°F (55°C to 65°C)-warm but gentle to preserve the milk’s creamy texture and sweetness.
Q5: Can microwaving milk too long ruin my cocoa?
A5: Overheating can cause milk to develop a burnt flavor and spoil the smoothness of your cocoa. It might also curdle or form a skin on top. Patience and short bursts of heating with stirring in between keep your cocoa deliciously smooth.
Q6: should I stir the milk during or after microwaving?
A6: Stir before microwaving to mix any cream layers, then again promptly after heating.This ensures even heat distribution and prevents hot spots that can burn your tongue or make the cocoa unevenly warm.
Q7: Any tips for the best microwave results?
A7: Use a microwave-safe ceramic or glass mug, heat in short intervals of 15-20 seconds if unsure, and always stir between intervals. Covering the mug loosely with a microwave-safe plate or paper towel helps keep the milk from splattering.
Q8: What if I want a thicker, creamier hot cocoa?
A8: Try warming a mixture of milk and a splash of cream, or use whole milk heated gently to preserve richness. Microwaving the milk first, then adding your cocoa powder or syrup results in creamy perfection every time.
Q9: Is it okay to microwave plant-based milks for cocoa?
A9: Absolutely! Almond, oat, soy, and other plant-based milks make delicious cocoa bases and generally microwave a bit faster. Just keep an eye on the heating time and stir well to avoid separation.
Q10: Any advice for taking the chill out but not boiling the milk?
A10: Start with small bursts of 20-30 seconds; test the temperature by carefully feeling the mug’s exterior or dipping a finger. Stop heating as soon as it reaches a cozy warmth to avoid overheating and maintain smooth, comforting cocoa every time.
In Retrospect
Whether you’re stirring up a cozy cup of cocoa on a chilly evening or simply craving that smooth, warm embrace of perfectly heated milk, knowing the right microwave time makes all the difference. Too short, and your drink feels lukewarm; too long, and you risk boiling over or losing that creamy texture. By mastering the simple timing tips we’ve explored, your cocoa will always be just the right kind of warm-inviting, comforting, and utterly delicious. So next time you reach for the microwave, remember: a little patience and precision turn a simple cup of milk into the perfect cocoa companion. Cheers to perfectly warmed moments in every sip!