In the hustle and bustle of modern life, finding a speedy yet nourishing snack can feel like a quest for the holy grail. Enter the humble granola bar-a compact bundle of energy and flavour that’s perfect for on-the-go munching.But what if you could elevate this snack to a whole new level, tailoring every bite to your taste buds and nutritional needs? Welcome to the world of crafting perfect microwave trail mix granola bars at home. With just a few simple ingredients, a microwave, and a pinch of creativity, you can whip up wholesome bars bursting with the crunch of trail mix and the wholesome goodness of granola, all without firing up the oven. Whether you’re a busy professional, an adventurous hiker, or a health-conscious parent, this guide will show you how to master the art of homemade granola bars that are as satisfying as they are convenient. Let’s dive in and transform your snack game-one tasty bar at a time.
Choosing the Ideal Ingredients for Flavor and Nutrition
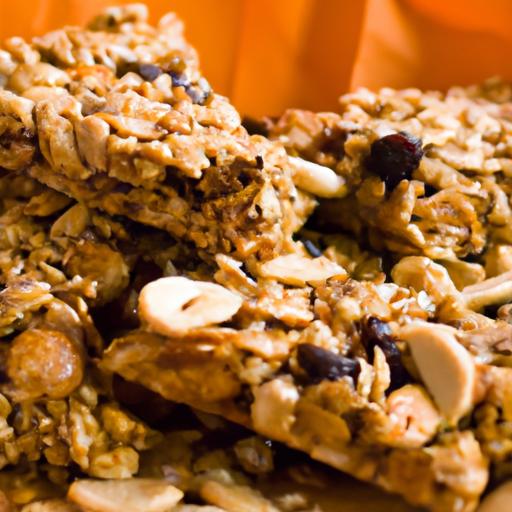
Crafting perfect microwave trail mix granola bars at home starts with a thoughtful ingredient selection that balances flavor, texture, and wholesome nutrition. To ensure each bar bursts with satisfying crunch and natural sweetness, opt for high-quality nuts like almonds, walnuts, or pecans, which provide essential healthy fats and protein. Incorporating a variety of dried fruits such as cranberries, apricots, or raisins introduces delightful chewiness and a hint of tangy sweetness, while also upping your fiber intake.
A wholesome base of old-fashioned rolled oats delivers complex carbohydrates and a nutty toastiness that’s the soul of any granola bar. For a natural binder, consider pure honey or maple syrup; these not only sweeten gently but help achieve that perfect chewy texture. a pinch of sea salt and a dash of cinnamon or vanilla extract amplify the flavors without relying on artificial enhancers. Choosing organic or minimally processed ingredients takes your homemade granola bars from good to extraordinary, making each bite nourishing and vibrant.
Mastering the Microwave Technique for Optimal Texture
Microwaving these bars unlocks a quick, energy-efficient way to meld flavors and textures without sacrificing quality. The key is precise timing and stirring to prevent overheating or uneven cooking. Begin by microwaving your binding ingredients-like honey and nut butter-on medium power in short 20-second bursts, stirring between each interval until silky smooth. This gentle warming allows easier integration with the dry components,ensuring every oat and nut is perfectly coated.
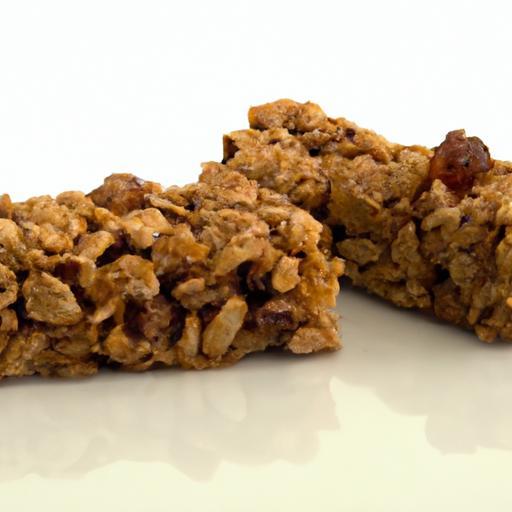
Once combined, press the mixture firmly into your pan before returning it to the microwave for a final 30-40 seconds at medium power. This helps the bars set quickly while maintaining chewiness. Avoid overcooking: the bars should spring back slightly when pressed, signaling perfect texture-soft, yet structured. Mastering this microwave technique will elevate your homemade bars every time, offering convenience without compromising the satisfying bite you expect from a quality trail mix snack.
customizing your Trail Mix for Unique Taste Profiles
One of the joys in crafting perfect microwave trail mix granola bars at home lies in personalization. To create your signature flavor, experiment with a mix of textures and tastes-think adding toasted coconut flakes for a tropical flair or a handful of dark chocolate chips for indulgent bursts of bittersweet luxury. For a spicy twist, a sprinkle of cayenne or ground ginger can add unexpected warmth that complements the natural sweetness.
Vary your nut base to suit dietary needs or cravings: pecans provide buttery richness,while pumpkin seeds add a crunchier texture packed with minerals. swap dried fruit with fresh chopped apples or pears (added after microwaving) for freshness. For vegan or nut-free versions, sunflower seed butter and hemp seeds make excellent alternatives, maintaining nutrition and flavor integrity. letting your creativity guide ingredient swaps ensures your granola bars stay exciting and tailored to your palate.
Tips for Storing and Keeping Your Granola Bars Fresh
Preserving the delightful texture of your homemade trail mix granola bars requires proper storage. Once fully cooled, wrap individual bars tightly in parchment or wax paper to prevent moisture accumulation and staleness. Store them in an airtight container at room temperature for up to one week, ideally in a cool, dry spot away from direct sunlight.
For longer shelf life,refrigerate the bars in a sealed container; this will keep them fresh for up to three weeks but may slightly firm the texture.To restore softness, allow bars to come to room temperature before eating.Alternatively, freeze portions wrapped securely in plastic wrap and placed inside freezer bags. Thaw overnight in the fridge or at room temperature when ready to enjoy. These tips help maintain that perfect balance of chewiness and crunch so your crafting perfect microwave trail mix granola bars at home stay just as delicious days after making them.

| Nutrient | Per Serving (1 bar) |
|---|---|
| Calories | 210 kcal |
| Protein | 6 g |
| Carbohydrates | 28 g |
| Fat | 9 g |
Prep and Cook Time
- Prep Time: 10 minutes
- Cook Time: 3-4 minutes (microwave)
- Total time: 15 minutes
Yield
approximately 8 bars (depending on size)
Difficulty Level
Easy – No baking required, perfect for beginners and busy cooks
Ingredients
- 1 ½ cups old-fashioned rolled oats
- 1 cup mixed nuts (almonds, pecans, walnuts), coarsely chopped
- ½ cup dried fruit (cranberries, apricots, or raisins), chopped if large
- ¼ cup honey (or pure maple syrup for vegan)
- ¼ cup natural almond butter (or peanut butter)
- 1 teaspoon vanilla extract
- ½ teaspoon ground cinnamon
- ¼ teaspoon sea salt
instructions
- Prepare the binding mixture: In a microwave-safe bowl, combine honey and almond butter. Microwave on medium power for 20 seconds, stir, then repeat in 20-second bursts until glossy and smooth.
- Add flavorings: Stir in vanilla extract, ground cinnamon, and salt until evenly combined.
- Mix dry ingredients: In a large bowl,combine rolled oats,chopped nuts,and dried fruit. Pour the warmed binding mixture over the dry ingredients.
- Combine thoroughly: Stir quickly but gently, coating all oats and nuts evenly to create a sticky, cohesive mixture.
- Shape the bars: press the mixture firmly into an 8×8-inch parchment-lined baking dish or microwave-safe container. Use a spatula or your hands (lightly moistened) to compact tightly for better texture.
- Set in microwave: Microwave on medium power for 30-40 seconds.Check firmness by gently pressing the top; it should spring back softly.If still too loose, microwave in 10-second increments.
- Cool wholly: Let the bars cool at room temperature or in the fridge for at least 20 minutes to fully set before slicing into bars.
Tips for Success
- Nut allergies? Substitute nuts with seeds like pumpkin or sunflower to maintain crunch and nutrition.
- make ahead: These bars keep well in airtight containers or individually wrapped, perfect for quick grab-and-go snacks during the week.
- Prevent sticking: Use parchment paper to line your dish and lightly oil your spatula or hands when pressing the mixture.
- Texture tweak: Add an extra 2 tablespoons of oats for chewier bars or a handful of crisp rice cereal for crunch.
- sweetness level: Adjust honey or syrup quantity depending on your preference and the sweetness of the dried fruit included.
Serving Suggestions
Enjoy your trail mix granola bars as a midday energy boost alongside a fresh fruit salad or a cup of herbal tea for balance. Garnish with a sprinkle of flaky sea salt or drizzle with melted dark chocolate for an elegant touch. Slice into bite-sized squares for party platters or wrap individually as thoughtful homemade gifts. These bars also shine crumbled over yogurt or smoothie bowls, adding satisfying texture and a nutritional boost.
for more wholesome snack ideas, check out our Healthy Homemade Smoothie Bowls. For authoritative insights on nutritional benefits of nuts and dried fruits, visit the American Society for Nutrition.
Q&A
Q&A: Crafting Perfect microwave Trail Mix Granola Bars at Home
Q1: Why make trail mix granola bars in the microwave instead of baking?
A1: Microwave crafting is a game-changer for quick, hassle-free granola bars. It slashes cooking time, keeps your kitchen cool, and lets you whip up fresh bars anytime the craving strikes-no oven preheating required!
Q2: What’s the secret to getting chewy yet firm granola bars using a microwave?
A2: Balancing moisture is key. Start with sticky binders like honey, maple syrup, or nut butter, then pulse the mixture just long enough in the microwave to meld ingredients without drying out. Let bars cool completely; they firm up as they set.
Q3: Which trail mix ingredients work best for homemade microwave granola bars?
A3: Think crunchy meets chewy: rolled oats,chopped nuts (almonds,pecans,cashews),dried fruits (cranberries,raisins,apricots),and seeds (pumpkin,chia,sunflower) provide texture and nutrition.Feel free to toss in a handful of dark chocolate chips or a sprinkle of cinnamon for extra flair!
Q4: How can I ensure my granola bars hold together without falling apart?
A4: The binder-to-dry-ingredient ratio is crucial.Use enough syrup or nut butter to coat every crumb. Press the mixture firmly into your pan before microwaving to encourage cohesion. Cooling completely before slicing seals the deal.
Q5: Can I customize the sweetness and flavors in these bars?
A5: absolutely! Control sweetness by adjusting honey or syrup amounts; experiment with vanilla extract,coconut flakes,or a pinch of sea salt to elevate flavors. The beauty of homemade bars lies in tailoring every bite to your taste buds.
Q6: How long do microwave trail mix granola bars stay fresh?
A6: Store them in an airtight container at room temperature for up to a week.For longer freshness, tuck them in the fridge-they’ll firm up nicely and last about two weeks. Wrapping individually makes them perfect grab-and-go snacks!
Q7: Are these microwave granola bars healthy?
A7: When made with wholesome ingredients like nuts, oats, and natural sweeteners, these bars offer a nourishing boost of energy and fiber. Skip processed additives and customize based on your dietary needs for a guilt-free treat.
Q8: Can I make these bars vegan or gluten-free?
A8: For vegan bars, swap honey with maple syrup or agave nectar. For gluten-free versions, opt for certified gluten-free oats and ensure all mix-ins meet your requirements. This recipe is wonderfully adaptable to diverse dietary lifestyles.
Q9: Any tips for perfecting the microwave cooking time?
A9: Microwave power varies, so start with short intervals-30 seconds to 1 minute-stir, then repeat as needed.Overcooking dries out bars, undercooking leaves them crumbly. Patience + testing = sweet success.
Q10: What containers or tools do I need to make these bars?
A10: Use a microwave-safe dish (glass or silicone works best), a mixing bowl, a spatula, and parchment paper for easy removal. pressing bars with the back of a spatula or your hands ensures even thickness and shape.
With these insider tips and creative twists, your homemade microwave trail mix granola bars will become a staple snack-fast, flavorful, and fabulously fresh!
Key Takeaways
With just a few wholesome ingredients and the magic of your microwave, crafting the perfect trail mix granola bars at home becomes an effortless and rewarding adventure. Not only do you gain full control over flavors and nutrition, but you also unlock a world of endless customization-from crunchy nuts and chewy dried fruits to a drizzle of honey or a sprinkle of cinnamon. So next time your snack cravings strike, skip the store-bought options and embrace this quick, creative, and satisfying homemade treat that fuels your day with energy and delight. Happy mixing, molding, and munching!