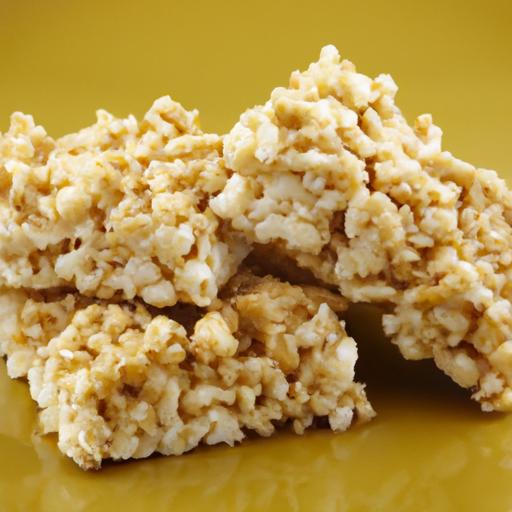
When craving a sweet, crispy snack but short on time, nothing hits the spot quite like homemade Rice Krispie treats. But who wants to spend ages melting marshmallows over the stove or stirring sticky mixtures when the microwave can do all the work in just minutes? Welcome to your ultimate Rapid & Easy Microwave Rice Krispie Treats Recipe Guide-a foolproof way to whip up these classic, gooey delights with minimal mess and maximum flavor. Whether you’re a busy parent, a last-minute party planner, or simply in need of a speedy sugar fix, this guide will have you stirring up mouthwatering treats faster than you can say “snap, crackle, pop.” Let’s dive in and make snack time as simple as can be!
Quick & Easy Microwave Rice Krispie Treats Recipe Guide starts your dessert journey with the perfect balance of crispy and chewy textures, capturing a nostalgic childhood favorite with a modern twist. These no-bake, microwave-pleasant treats elevate simplicity, making it easy to whip up a delightful snack in minutes. Whether it’s a last-minute party or a sweet craving, the magic lies in the ingredients you choose and the method you follow.
Prep and Cook Time
- Preparation Time: 5 minutes
- cooking Time: 3 to 5 minutes (microwave)
- total Time: 10 minutes
Yield
Approximately 9 to 12 servings, depending on cut size.
Difficulty Level
Easy: Perfect for beginners and busy home bakers looking for a fuss-free dessert.
Ingredients
- 6 cups Rice Krispies cereal
- 4 cups mini marshmallows (or 1 package, 10 oz)
- 3 tablespoons unsalted butter
- 1 teaspoon pure vanilla extract
- Optional: pinch of salt to enhance flavor
Step by Step Microwave Method for Effortless Treats
- Prepare your pan: Lightly grease a 9×13-inch baking pan or line it with parchment paper for easy removal and cleanup.
- Melt the butter: in a large, microwave-safe bowl, microwave the butter for 30-45 seconds until melted and foamy.
- Add marshmallows: Stir in the mini marshmallows to the melted butter, then microwave on high for 1 minute. stir thoroughly.
- Continue melting: Microwave in additional 15-second intervals, stirring after each, until the marshmallows are fully melted and glossy. Be careful not to overheat to avoid scorching,as a smooth mixture ensures perfect chewiness.
- Flavor boost: Stir in the vanilla extract and a pinch of salt to amplify the flavors and balance the sweetness.
- Combine with cereal: Promptly add the Rice Krispies cereal to the marshmallow mixture. Using a buttered spatula or spoon,gently fold until every crispy flake is coated.
- Set the treats: Transfer the mixture to your prepared pan and press firmly but gently with a buttered spatula or wax paper-firm enough to hold the shape without crushing the crispy texture.
- Cool and cut: Let the treats cool completely at room temperature, about 30 minutes, before slicing into squares or fun shapes.
Choosing the Perfect Ingredients for Crispy and Chewy Texture
To achieve that iconic chewy-yet-crisp bite, fresh marshmallows are key; avoid stale or old bags as they may yield dense or hard treats. Similarly, classic Rice Krispies brand cereal offers the ideal puffiness and crunch thanks to its precise rice-to-air ratio. Butter enriches the mixture, providing a smooth mouthfeel and preventing clumps. For an extra touch,add a splash of pure vanilla extract-this aromatic addition enhances depth without overwhelming sweetness,while a small pinch of salt rounds out the flavor profile and cuts edge bitterness that sometimes arises from melting marshmallows. If craving even more texture contrast, consider adding chopped nuts or candy pieces-just make sure they are finely diced to maintain balance.
Tips for Customizing Your rice Krispie Treats with Fun Additions
This Quick & Easy Microwave Rice Krispie Treats Recipe Guide encourages creativity! Here are some exciting ways to personalize your treats:
- Chocolate lover’s twist: Fold in ½ cup mini chocolate chips just before pressing the mix into the pan.
- Fruit bursts: Add ½ cup dried cranberries or chopped freeze-dried raspberries for a tart contrast.
- Nutty upgrade: Toss in ½ cup chopped toasted almonds, pecans, or peanuts for crunch and savory notes.
- sprinkle magic: Press rainbow sprinkles on top right after spreading the mixture for festivity and color.
- Peanut butter swirl: Melt ¼ cup creamy peanut butter and swirl into marshmallow mixture after melting for a luscious marbled effect.
Creative Serving Ideas to Impress Friends and Family
Presentation transforms simple Rice Krispie treats into party showstoppers.Consider these approaches:
- Themed shapes: Use cookie cutters to create stars, hearts, or holiday motifs-perfect for kids’ birthday parties or seasonal celebrations.
- layered bars: Press a layer of chocolate ganache or peanut butter beneath the Rice krispie mix for a decadent surprise.
- Stick treats: Insert popsicle sticks before the marshmallow fully sets for fun Rice Krispie pops,great for serving at gatherings.
- Drizzled toppings: After cooling, drizzle melted dark or white chocolate over the top and garnish with sea salt flakes for a gourmet flair.
- Festive packing: Wrap individual squares in colored cellophane tied with ribbon as charming edible gifts.
Chef’s Notes and Tips for Success
- Don’t overheat: Microwave in short bursts when melting marshmallows; overheated marshmallows become tough and grainy.
- Butter your spatula: Prevent sticking by buttering your utensils before mixing and pressing.
- Work quickly: The marshmallow mixture sets fast; have your pan ready before combining with cereal.
- Make ahead: Store treats airtight at room temperature up to 3 days for optimal freshness.
- Gluten-free: Rice Krispies treats are gluten-free if you use certified gluten-free cereal; double-check your brand for a safe option.
| Nutrient | Per Serving (1 bar) |
|---|---|
| Calories | 150 |
| Protein | 2g |
| Carbohydrates | 28g |
| Fat | 3g |
For more creative no-bake treats, check out our Easy No-Bake Desserts roundup. For insight into the science behind marshmallow melting, visit the Food Network’s marshmallow science page.

Q&A
Quick & Easy Microwave rice Krispie Treats Recipe Guide: Q&A
Q1: What makes microwave Rice Krispie treats different from the conventional stovetop method?
A1: Microwave Rice Krispie treats are all about speed and simplicity! Instead of melting butter and marshmallows on the stove, you use a microwave-safe bowl to quickly melt everything together. This method saves time, reduces cleanup, and is perfect for spontaneous sweet cravings or when the stove is occupied.
Q2: How long does it take to make Rice Krispie treats in the microwave?
A2: From start to finish, you’re looking at about 5-7 minutes! Melting the marshmallows and butter usually takes around 1-2 minutes, mixing in the cereal just a minute or two more, and then a few minutes of pressing into the dish. Quick, easy, and indulgently gooey!
Q3: Can I customize the recipe with add-ins or flavors?
A3: Absolutely! The beauty of making treats in the microwave is that you can stir in a handful of chocolate chips, colorful sprinkles, or even a dash of vanilla or almond extract right after melting the marshmallows. Want something nuttier? Toss in chopped nuts or swirl in peanut butter before adding the cereal.
Q4: What’s the secret to getting the perfect chewy texture?
A4: The key is not to overcook the marshmallows. Melt until smooth but keep an eye to avoid burning. Also,press the mixture gently but firmly into your pan-too much pressure can make the treats dense and hard rather of soft and chewy.
Q5: Can this microwave method be doubled or tripled for larger batches?
A5: Yes! Just make sure to use a larger microwave-safe bowl and stir thoroughly to melt evenly. You might need to heat in short bursts of 30 seconds, stirring in between, to prevent scorching. Then, fold in your cereal bit by bit to ensure even coating.
Q6: are microwave Rice Krispie treats kid-friendly and safe to make?
A6: Definitely! This method is perfect for baking newbies and kids alike as it requires minimal utensils and stove-free cooking. Adults shoudl assist with the hot melting step, but once melted, kids can easily help mix and press the treats.Q7: How should I store leftover Rice Krispie treats?
A7: Keep them airtight at room temperature to maintain their classic crispy-chewy perfection. Stored this way, they’ll stay fresh for about 3-5 days. Pro tip: avoid refrigerating-they tend to harden and lose that blissful texture.
Q8: Can I make vegan or gluten-free microwave Rice Krispie treats?
A8: Yes! Swap regular marshmallows for vegan-friendly versions, use dairy-free butter, and choose gluten-free crispy rice cereal. The quick microwave melting process works just as well for these dietary tweaks, so everyone can enjoy a sweet treat in minutes.
Ready to whip up a batch? With this microwave magic, homemade Rice Krispie treats are just a few minutes and a few simple steps away-no apron required!
In Conclusion
there you have it-a simple, speedy way to satisfy your sweet tooth with those iconic crispy, gooey rice Krispie treats.Whether you’re whipping up a last-minute snack or a fun activity for the kids,this microwave method proves you don’t need a intricate recipe to achieve that perfect,melt-in-your-mouth magic. So next time the craving strikes,remember: delicious treats are just minutes away,with nothing more than a bowl,a microwave,and a sprinkle of creativity. Happy snacking!