In the whirlwind of busy days and last-minute cravings,there’s nothing quite as satisfying as a sweet treat that’s both quick to make and irresistibly fluffy.Enter the world of microwave Rice Krispie treats-a timeless classic reinvented for the modern kitchen. Forget standing over a steaming pot or waiting for the perfect melt; with just a few simple steps and a microwave, you can whip up these crispy, marshmallowy delights in minutes. Whether you’re an experienced baker or a novice looking for an easy dessert fix, our guide to quick and fluffy microwave Rice Krispie treats will have you indulging in gooey, golden squares faster than you can say “snack time!”
Quick Tips for Perfectly Fluffy Microwave Rice Krispie Treats
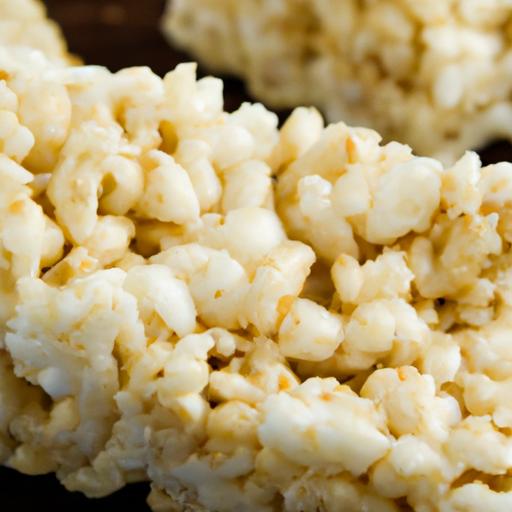
Quick & Fluffy Microwave Rice Krispie Treats Made Easy are a nostalgic favorite, bringing a timeless childhood classic into fast-forward mode without sacrificing fluffiness or flavor. Harnessing the microwave to create that perfectly airy, chewy texture is an art – and with a few simple tips, you’ll master it effortlessly every time.
Start by selecting fresh, crispy rice cereal-avoid any that feel soggy or stale, as they won’t puff up as nicely. When it comes to the marshmallows, use high-quality, full-sized ones; mini marshmallows can melt unevenly and yield a denser treat. Butter quality matters too – opt for unsalted butter to better control balance in sweetness and texture.
Choosing the Right Ingredients for Maximum Flavor and Texture
- Rice cereal: Use a classic puffed rice cereal like Kellogg’s Rice krispies for the ideal light crunch and signature snap.
- Marshmallows: Fresh, fluffy marshmallows (preferably classic ones, not mini) give optimal melt and chewiness.
- Butter: Unsalted, high-quality butter enhances richness-measure carefully for the perfect balance between moist and airy.
- Optional extras: A pinch of fine sea salt can elevate sweetness, while a dash of pure vanilla extract adds depth.
Step by Step Guide to Effortless microwave Preparation
- prep the pan: Lightly grease an 8×8-inch dish with butter or line it with parchment paper for easy removal.
- Melt the butter: Combine butter and marshmallows in a large microwave-safe bowl. Microwave in 30-second bursts, stirring after each, until just melted and smooth-about 1½ to 2 minutes total. Watch carefully to avoid scorching.
- Flavor boost: Stir in a teaspoon of pure vanilla extract and a pinch of salt to balance sweetness and intensify flavor.
- Mix in cereal: Quickly fold the rice cereal into the marshmallow mixture using a spatula. Work fast for even coating without crushing the delicate cereal texture.
- Transfer & shape: Pour the mixture into the prepared pan. Press down gently with a buttered spatula or wax paper-avoid compacting too firmly to maintain fluffiness.
- Set & serve: Let cool at room temperature for at least 30 minutes before slicing into squares.
Creative Variations to Elevate Your Classic rice Krispie Treats
- Chocolate swirl: Melt dark or milk chocolate and drizzle over the top before the treats set. For a marbled effect, gently swirl the chocolate into the marshmallow mixture.
- Nutty crunch: Toss in chopped toasted almonds, pecans, or hazelnuts for texture contrast and nutty richness.
- Fruity zest: Mix in freeze-dried raspberries or dried cranberries for a tart note that brightens the sweetness.
- Seasonal cheer: Add a sprinkle of pumpkin spice or cinnamon in the marshmallow melt step for cozy warmth and depth.
- Sprinkle surprise: Top with colorful nonpareils, edible glitter, or rainbow sprinkles while still warm for festive flair.
prep and cook Time
- Prep Time: 5 minutes
- Cook Time: 2-3 minutes
- Cooling Time: 30 minutes
- Total Time: Approximately 40 minutes
Yield
About 9-12 servings depending on size of cuts
Difficulty Level
Easy – perfect for beginners and quick snack fixes
Ingredients
- 4 tablespoons unsalted butter
- 10 ounces classic marshmallows (about 4 cups for mini or 40 large)
- 6 cups puffed rice cereal (such as Rice Krispies)
- 1 teaspoon pure vanilla extract (optional but recommended)
- Pinch of fine sea salt (optional)
Instructions
- Grease or line: Prepare your 8×8-inch pan by buttering the surface or lining it with parchment for effortless removal.
- Melt butter and marshmallows: Place the butter and marshmallows in a large microwave-safe bowl. Microwave on high for 30 seconds, stir, then continue microwaving in 20-30 second increments, stirring after each, until smooth and fully melted (about 1½-2 minutes).Avoid overheating to prevent a grainy texture.
- Add vanilla and salt: Immediately stir in vanilla extract and a pinch of sea salt for balanced, enhanced flavor.
- Fold in cereal: Quickly add the rice cereal to the marshmallow mixture. Using a spatula, gently fold to coat the cereal fully, preserving its airy crunch.
- Press and set: Transfer the sticky mixture to your prepared pan. Using a buttered spatula or wax paper, press gently to even out the surface. Avoid packing down too tightly – you want to keep them fluffy!
- Cool and slice: Let the treats cool at room temperature for at least 30 minutes. Once firm,slice into squares or desired shapes and serve.
Tips for Success
- microwave ovens vary-adjust time in 10-second increments if needed to avoid burning the marshmallows.
- Use a large bowl to give yourself room for mixing without spilling sticky marshmallow goo.
- For easier cutting, dip your knife in hot water and wipe dry between slices to avoid sticking.
- Store treats in an airtight container to maintain softness; layering parchment paper between helps prevent sticking.
- For a vegan or dairy-free version,substitute vegan butter and marshmallows labeled as vegan-amiable.
Serving Suggestions
These treats are a joyous snack on their own but can be transformed into an indulgent dessert centerpiece by pairing with:
- A scoop of homemade vanilla bean ice cream
- Fresh berries and a dusting of powdered sugar
- Drizzles of salted caramel or chocolate sauce
- Festive sprinkles or edible flowers for celebrations
Cut into bite-sized cubes or fun shapes using cookie cutters to charm kids and adults alike!
| Nutrient | Per Serving |
|---|---|
| Calories | 150 kcal |
| Protein | 1 g |
| Carbs | 30 g |
| Fat | 4 g |
Explore more quick marshmallow dessert recipes hear and visit Allrecipes’ expert guide on rice cereal treats for additional inspiration.

Q&A
Quick & Fluffy: Microwave Rice Krispie Treats Made Easy – Q&A
Q1: What makes these microwave Rice Krispie treats different from the classic oven-baked versions?
A1: The microwave method speeds up the process, melting marshmallows and butter in minutes without the need for a stovetop or oven. This creates a fluffier, lighter texture and lets you whip up a batch in under 10 minutes-perfect for last-minute cravings or quick dessert fixes.
Q2: Can I customize the recipe with different mix-ins or toppings?
A2: Absolutely! While the original calls for rice Krispies cereal, you can mix in mini chocolate chips, sprinkles, or chopped nuts after melting the marshmallow mixture. For toppings, a drizzle of melted chocolate or a sprinkle of sea salt adds a delightful twist.
Q3: What’s the trick to getting the marshmallows perfectly melted without burning?
A3: Microwave in short bursts of 30 seconds, stirring in between. This gradual heating helps avoid overheating and ensures that the marshmallows melt smoothly with the butter, creating that signature gooey, fluffy base.
Q4: Are there any tips for making the treats easier to cut and less sticky?
A4: Lightly grease your pan or press the mixture firmly into place with a buttered spatula. After setting, refrigerate for 15-20 minutes before slicing-it firms up the treats, making clean cuts easier and reducing stickiness on your fingers.
Q5: Can I make these treats vegan or gluten-free?
A5: Definitely! Use vegan marshmallows and dairy-free butter alternatives to keep it plant-based. For gluten-free, swap the Rice Krispies for gluten-free crispy rice cereal. The end result remains just as fluffy and tasty.Q6: How should I store leftover treats to keep them fresh?
A6: Store them in an airtight container at room temperature for up to 3 days. For longer storage, pop them in the fridge-just bring them back to room temp before serving for soft, fluffy bites.
Q7: What’s a fun presentation idea for kids or parties?
A7: Cut the treats into fun shapes using cookie cutters-think stars, hearts, or animals. You can also layer them with colorful sprinkles or edible glitter for a festive look that’s as irresistible to the eye as it is to the taste buds.
Q8: Can I double the recipe to make a larger batch? any adjustments needed?
A8: You can double or even triple the batch! Just melt the marshmallows and butter in increments if your microwave can’t handle the volume all at once. Stir well to maintain even distribution before mixing with the cereal.
This Q&A serves as your tasty guide for mastering quick & fluffy microwave Rice Krispie treats that satisfy every sweet tooth, with zero fuss and maximum joy!
Key Takeaways
Whip up these quick and fluffy Microwave Rice Krispie Treats whenever a sweet craving strikes or unexpected guests arrive. With just a few pantry staples and a microwave, you can transform everyday ingredients into a gooey, melt-in-your-mouth delight-no oven needed. Whether you’re a busy parent, a last-minute dessert hero, or simply in the mood for a nostalgic treat, this easy recipe proves that sometimes the simplest methods yield the most magical results. So go ahead, gather your marshmallows and crispy rice, and enjoy a bite-sized moment of pure, fluffy happiness-made easy, made quick, made for you.