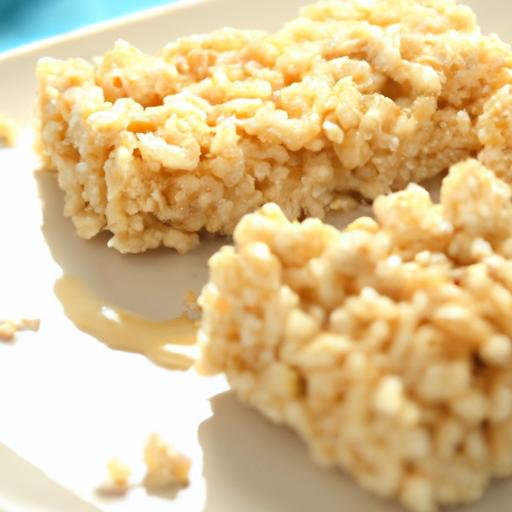
In the world of sweet treats, few delight as effortlessly as the classic Rice Krispie treat-a perfect harmony of crispy crunch and gooey sweetness. But what if savoring this nostalgic snack didn’t require a pot on the stove or a sticky mess to clean up? Enter the microwave: your new best friend in crafting rapid and gooey Rice Krispie treats that melt in your mouth and come together in minutes. Whether you’re a dessert novice or a shortcut-savvy snack lover, mastering microwave Rice Krispie treats opens the door to a deliciously simple indulgence that’s as fun to make as it is indeed to eat. Let’s dive into the secrets of this speedy,satisfying sweet and discover how to achieve that ideal chewy texture with minimal fuss and maximum flavor.
Quick & Gooey: Mastering Microwave Rice Krispie Treats unlocks the secret to creating irresistibly soft, melt-in-your-mouth marshmallow bars in just minutes. Born from a childhood favorite transformed into a speedy, no-fuss delight, these treats combine the nostalgia of crispy cereal clusters with the warm comfort of melted marshmallows – all crafted effortlessly in your microwave.
Prep and Cook Time
Prep: 5 minutes | Cook: 3-4 minutes | Total: 8-9 minutes
Yield
Makes 12 generous squares
Difficulty Level
Easy – perfect for last-minute snacks and beginner bakers alike
Ingredients
- 6 cups Rice Krispies cereal (see note on brands below)
- 4 cups mini marshmallows
- 3 tablespoons unsalted butter
- 1/2 teaspoon pure vanilla extract
- Pinch of fine sea salt
Choosing the Best Rice Krispie brands for Superior Texture
While the classic kellogg’s Rice Krispies remain a solid choice, experimenting with more textured or glutinous variants like General Mills’ Rice Chex or Trader Joe’s Crispy Rice can create chewier, heartier treats. Rice cereal with slightly puffier, uniform shapes helps achieve peak gooeyness by ensuring marshmallows coat each bite evenly, resulting in that coveted tender yet crispy balance.
Instructions
- Prepare your pan: Grease a 9×13-inch baking dish with butter or line it with parchment paper for easy removal of treats later.
- Melt the butter and marshmallows: In a large microwave-safe bowl,combine 3 tablespoons unsalted butter and 4 cups mini marshmallows. Microwave on high for 1 minute, then stir. Continue microwaving in 30-second bursts, stirring after each, until completely melted and smooth.
- Add vanilla and salt: Stir in 1/2 teaspoon vanilla extract and a pinch of fine sea salt to elevate the sweetness with a subtle depth.
- Combine with cereal: Instantly add 6 cups Rice Krispies to the melted mixture. Using a sturdy spatula or buttered hands, fold gently yet thoroughly to coat every crisp grain without crushing them.
- Press into pan: Transfer the mixture into the prepared dish. Press down evenly but gently with a buttered spatula or wax paper to compact the treats without squashing the airy texture.
- Cool and set: Let the treats cool at room temperature for at least 30 minutes. For faster results, chill them in the fridge for 10-15 minutes before slicing into squares.
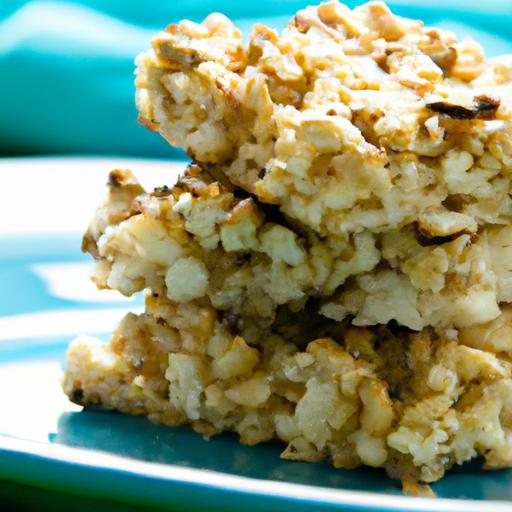
Expert Tips for Customizing Flavors and Add-Ins
- Flavor twists: stir in a teaspoon of cinnamon, pumpkin spice, or citrus zest during the marshmallow melting stage for seasonal flair.
- Add crunch: Toasted coconut flakes, chopped nuts, or crispy quinoa can be folded in with the cereal for added texture.
- Chocolate lovers: Drizzle melted dark or white chocolate across the cooled treats or fold mini chocolate chips into the warm mixture for pockets of melty sweetness.
- Make it colorful: Mix in sprinkles or use fun cereals like Fruity Pebbles to create vibrant, festive batches.
Serving Suggestions
slice the bars into neat squares and serve on a bright platter garnished with a dusting of powdered sugar or a sprinkle of mini chocolate chips. Pair these chewy, gooey treats with a cold glass of milk or a cup of hot cocoa for an indulgent, nostalgic snack time.for party presentations, stack bars on a tiered dessert tray and add fresh berries or edible flowers for visual contrast.
Tips for Success
- Microwave power varies-adjust melting time accordingly to avoid scorching marshmallows.
- Use buttered spatulas or wet hands when pressing the mixture to prevent sticking.
- For gluten-free options, ensure your Rice Krispies brand is certified gluten-free.
- Store treats in an airtight container at room temperature for up to 3 days, or freeze for longer keeping.

| nutrient | Per Serving (1 square) |
|---|---|
| Calories | 150 kcal |
| Protein | 1 g |
| Carbohydrates | 30 g |
| Fat | 4 g |
Discover more about perfect snack recipes like this in our Easy No-Bake Desserts series. For ingredient sourcing tips, visit this official Rice Krispies brand page.
Q&A
Q&A: Quick & Gooey – Mastering Microwave rice Krispie Treats
Q1: What makes microwave Rice Krispie Treats different from the conventional stovetop method?
A: Microwave Rice Krispie Treats cut down on time and cleanup by melting the butter and marshmallows in one simple bowl with just a minute or two of heating. This method keeps things quick and gooey without the need to stand over a stove, making it perfect for busy days or spontaneous snack cravings.
Q2: How do I ensure my treats come out perfectly gooey every time?
A: The secret lies in gentle heating and immediate mixing. Microwave the butter and marshmallows in short bursts-about 30 seconds each-stirring in between to avoid overheating. Then, fold in the cereal while the mixture is still hot and pliable. Press the mixture firmly into the pan with a buttered spatula for an even, chewy texture.
Q3: Can I customize the flavor of my Rice Krispie Treats made in the microwave?
A: Absolutely! Vanilla extract or a pinch of salt added to the melted mixture enhances depth. For a creative twist, consider mixing in colorful sprinkles, mini chocolate chips, or a swirl of peanut butter right after melting. The microwave method allows quick experimentation without extra mess.
Q4: What type of cereal works best for microwave treats?
A: Classic Rice Krispies are king for thier light crispness and perfect puffed texture. Though,other puffed rice cereals or even puffed quinoa can make fun variations; just be mindful that denser cereals may require more marshmallow to bind properly.Q5: How do I store homemade Rice Krispie treats to maintain their softness?
A: Store them in an airtight container at room temperature.Wrapping them individually or layering wax paper between treats prevents sticking and keeps them fresh for up to three days. For longer storage, freeze in a sealed bag and thaw before serving to retain gooey goodness.
Q6: Is there a way to make these treats a bit healthier while keeping the gooey texture?
A: To lighten them up, try substituting part of the butter with coconut oil for a subtle tropical note, or mix in a handful of chopped nuts or dried fruit for natural sweetness and crunch. remember, the magic comes from that marshmallow melt, so keep a good balance to maintain that signature gooey finish.
Q7: What’s the best technique for cutting microwave Rice Krispie treats without them crumbling?
A: Let the treats cool completely but not harden overnight. Use a sharp knife coated lightly with cooking spray or run under hot water and dried before slicing. This prevents sticking and ensures clean edges, giving you picture-perfect squares for sharing.
Q8: can kids help with making Rice Krispie Treats in the microwave?
A: definitely! The microwave method is safer and easier for little hands. Children can definitely help measure ingredients, stir the melted mixture, and press the cereal into the pan. Just supervise the heating step, as the bowl and melted mix get hot quickly.
Ready to whip up your own batch of quick & gooey delights? With these expert tips, mastering microwave Rice Krispie Treats becomes a snap-and a delicious, sticky-fingered adventure!
Key Takeaways
With the magic of the microwave and a handful of simple ingredients, mastering quick and gooey Rice Krispie treats is no longer a kitchen mystery but a delicious reality. Whether you’re whipping up a last-minute snack or impressing guests with your speedy sweet skills, these treats prove that sometimes the best things in life really are the simplest-and stickiest. So next time a craving strikes, skip the complicated recipes and embrace the effortless joy of microwave-made marshmallow masterpieces. Happy snacking!